Creating DIY acoustic panels for your studio offers a cost-effective solution that can improve sound quality dramatically. You can save around 50% compared to commercial options while customizing the size, material, and design to meet your specific needs. Building your panels not only enhances acoustics using effective materials like Rockwool or foam, but it also gives you a hands-on understanding of sound treatment principles. Plus, you can design them to match your studio’s aesthetic, making them functional and visually appealing. There’s plenty more to reflect upon that can enhance your studio experience even further.
Key Takeaways
- DIY acoustic panels are cost-effective, saving about 50% compared to commercial options while providing high-quality sound treatment.
- Customizable designs allow you to tailor the size, material, and aesthetic to fit your studio’s specific needs.
- Building your own panels enhances understanding of acoustics, offering an educational experience in sound treatment.
- Effective sound absorption from materials like Rockwool and fiberglass leads to improved recording and mixing quality in your studio.
Benefits of DIY Acoustic Panels
DIY acoustic panels offer considerable benefits, including cost savings and the ability to customize them to fit your unique space and sound treatment needs. By opting for DIY solutions, you can save approximately 50% compared to commercial options, making it a budget-friendly way to achieve effective sound absorption. You’ll get the same, if not better, sound treatment without overspending.
The customizability of DIY acoustic panels is another reason to take this route. You can tailor the size, material, and aesthetic to fit your specific studio needs and design preferences, ensuring that your panels blend seamlessly with your space. When properly constructed, these panels can greatly improve sound quality by reducing unwanted reflections and reverberation, thanks to effective sound absorption materials like Rockwool or fiberglass.
Installation is straightforward, too. With just basic tools, you can mount your panels on walls or ceilings, making this project accessible even if you have minimal construction experience.
Plus, creating your own panels provides an educational experience, enhancing your understanding of acoustics and sound treatment, making it a rewarding endeavor overall.
Understanding Acoustic Panel Materials
Choosing the right materials for acoustic panels is essential, as each option offers distinct sound absorption qualities that cater to your specific acoustic needs.
Foam panels are a popular choice due to their lightweight nature and ease of installation. They effectively absorb high-frequency sounds, helping to minimize echoes and enhance overall sound quality in your studio.
On the other hand, fiberglass panels are renowned for their excellent mid-to-high frequency absorption. Their fire-resistant properties make them suitable for various environments, providing both safety and sound control.
If you’re looking for a more robust solution, rock wool panels excel in absorbing low-to-mid frequency sounds. They offer sound insulation and fire resistance, making them ideal for critical listening areas where clarity is paramount.
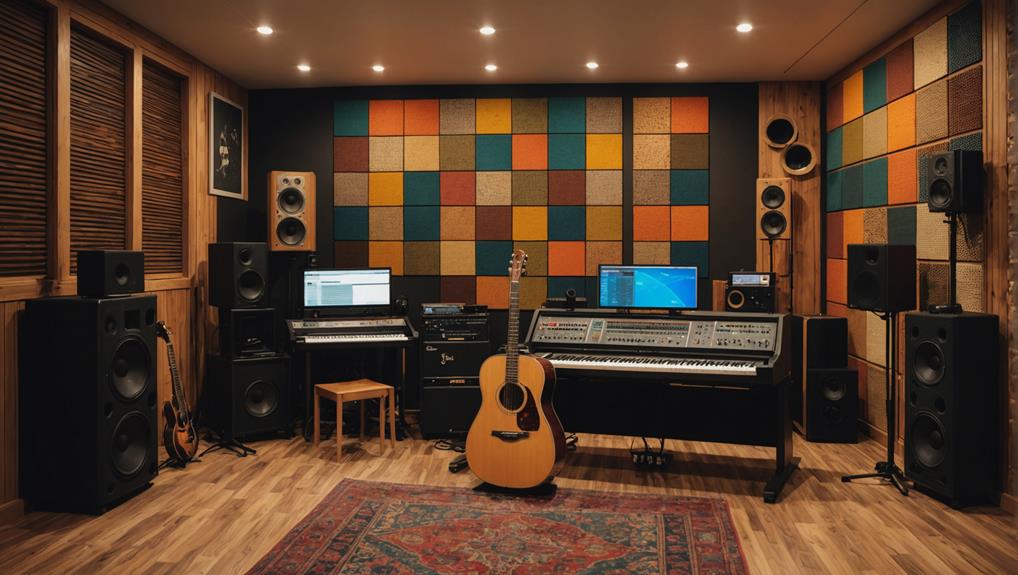
Custom acoustic panels can also be designed to match your aesthetic preferences while maintaining effective sound absorption. This way, you can achieve a balance of functionality and visual appeal in your studio.
Steps to Build Acoustic Panels

Begin by constructing a sturdy wood frame using 1×4 lumber to guarantee a snug fit around your insulation material, typically Rockwool or fiberglass. This frame will provide the foundation for your acoustic panels, which can help absorb sound effectively. Make sure the dimensions are precise to prevent sagging.
Next, choose breathable fabrics like polypropylene or burlap to cover the panels. These different materials allow sound to pass through while providing an attractive finish. Once you have your fabric, use adhesives like 3M Adhesive Spray or Liquid Nails to attach it to the frame. Secure the fabric tightly using a staple gun, ensuring ideal sound insulation.
When your panels are complete, position them on bare walls, focusing on first reflection points and corners. This placement is vital for minimizing sound reflections and reducing bass frequencies in your studio.
Finally, utilize tools like a hammer, square, and roll-up tape measure for precise assembly. Before finalizing, double-check the alignment and appearance of your panels.
With these steps, your DIY acoustic panels will be ready to enhance your studio’s sound quality.
Choosing the Right Fabric
Selecting the right fabric for your acoustic panels plays an essential role in enhancing sound absorption and achieving a polished look. To maximize efficiency, you should choose breathable materials like polypropylene or cotton. These fabrics allow sound waves to pass through, improving absorption. Avoid using nylon or non-breathable fabrics, as they can reflect sound waves, reducing the panels’ effectiveness.
When it comes to color, darker fabrics are often preferred. They can hide imperfections and contribute to a more professional appearance. Lighter fabrics, on the other hand, may be transparent and reveal the underlying frame, which can detract from the overall aesthetic.
Tightly wrapping the fabric around the frame is imperative. This guarantees the integrity of the panels and maintains a clean look. Make sure to pull the fabric snugly during the stapling process, securing it to both the front and back of the panel. This not only improves the visual appeal but also enhances sound absorption, minimizing the risk of sagging or shifting.
Installation Tips for Panels

Effectively installing your acoustic panels can greatly enhance sound quality in your space. To get started, position your panels on bare walls where they can considerably reduce noise and minimize sound reflections from your monitors.
Don’t forget about the corners; placing bass traps there will help absorb low-frequency sound waves that often gather in these areas.
Next, identify first reflection points on the side walls. Sit at your mixing position and have someone move a mirror along the wall. Wherever you can see your speakers in the mirror, that’s where you’ll want to place your panels.
For additional sound absorption, consider adding ceiling-mounted acoustic panels, also known as clouds, above your mixing area.
Lastly, use a mix of different types of panels, such as foam and fabric-wrapped options. This variety will help you tackle various frequencies and improve the overall acoustic treatment of your space.
Cost-Effectiveness of DIY Solutions
Installing acoustic panels doesn’t have to break the bank, and opting for DIY solutions can save you a significant amount while enhancing your sound quality. DIY acoustic panels can cost around 50% less than commercial options, making them a budget-friendly choice for your recording studio.
Here’s a quick cost breakdown to illustrate the cost-effectiveness of DIY panels:
| Item | Estimated Cost |
|---|---|
| Tools | $200 |
| Wood Blocks | $50 |
| Fabric & Labor | $250 |
| Total | $500 |
Optimizing Panel Placement
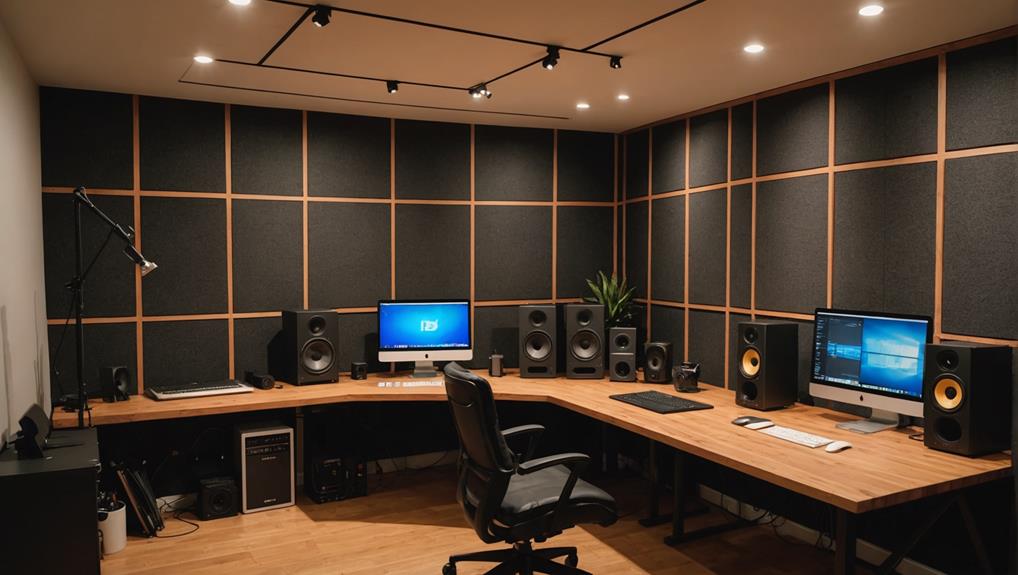
Positioning your acoustic panels strategically can dramatically enhance sound clarity and minimize unwanted reflections in your recording space. Start by placing panels on bare walls, especially opposite sound sources and first reflection points. This setup effectively reduces unwanted sound reflections and improves overall audio quality.
Don’t forget about the corners; installing panels there helps trap bass frequencies, essential for a balanced sound in your studio. Additionally, consider placing panels behind your monitors to capture reflections from the front wall. This minimizes interference during critical listening and mixing sessions, allowing for better decision-making in your audio projects.
You can also enhance your acoustic treatment by installing panels on the ceiling, often called ‘clouds.’ These absorb sound that reflects off the ceiling, preventing it from falling back into the listening area and causing muddiness.
For the best results, consider utilizing a professional acoustic analysis. It can provide tailored recommendations for ideal panel placement and the right panel count, ensuring you maximize the effectiveness of your acoustic treatment.
With careful planning, you’ll create a more controlled and enjoyable recording environment.
Enhancing Studio Aesthetics With Panels
Customizing your DIY acoustic panels not only improves sound quality but also elevates the visual appeal of your studio. By choosing colors and fabrics that resonate with your style, you can seamlessly integrate these panels into your studio aesthetics. Fabric-wrapped panels serve as both a critical component for sound absorption and a striking decorative element.
Consider these ideas to enhance your studio’s look:
- Custom Designs: Create panels with printed artwork or unique shapes that showcase your personality.
- Strategic Placement: Arrange panels to break up large wall spaces, adding texture and depth to your studio design.
