
Table of Contents
To create professional-sounding voiceover recording in your home studio, start by choosing a quiet, non-square space and sealing gaps to reduce noise. Invest in a quality condenser microphone and an audio interface for crisp recordings. Use acoustic treatments like foam panels or heavy curtains to enhance sound quality. Keep a consistent distance from the mic and monitor your audio levels to avoid distortion. Record multiple takes for variation and edit your audio to polish the final product. These tips will elevate your voiceover game. Stick around to discover even more insights to perfect your recording process!
Key Takeaways
- Choose a quiet, non-square room with sound-absorbing materials like carpets and curtains to minimize noise and echo.
- Invest in a quality condenser microphone and an audio interface for clear, professional sound quality.
- Maintain a distance of 6-8 inches from the microphone and use a pop filter to reduce plosive sounds.
- Regularly monitor audio levels between -12 dB and -6 dB to ensure clarity and prevent distortion.
Choose the Right Space
Choosing the right space is essential for achieving high-quality voiceover recordings, as it directly impacts your audio clarity and overall comfort. Start by selecting a quiet place, avoiding rooms that share walls with kitchens or bathrooms to minimize external noise interference. Non-square room shapes are preferable since they help control the acoustic environment, reducing sound distortion and improving your recordings.
Once you’ve found a suitable area, focus on soundproofing your home recording space. Seal gaps around doors and windows to prevent ambient sounds from creeping in. Don’t overlook the importance of sound absorption; consider using soft materials like carpets or curtains to absorb excess echo.
Remember to guarantee your recording environment has adequate ventilation and natural light. This can make long sessions more comfortable and less draining. You might even consider unconventional spaces like closets or corners of rooms. These areas can offer a more controlled acoustic environment at little to no cost, enhancing your recording quality.
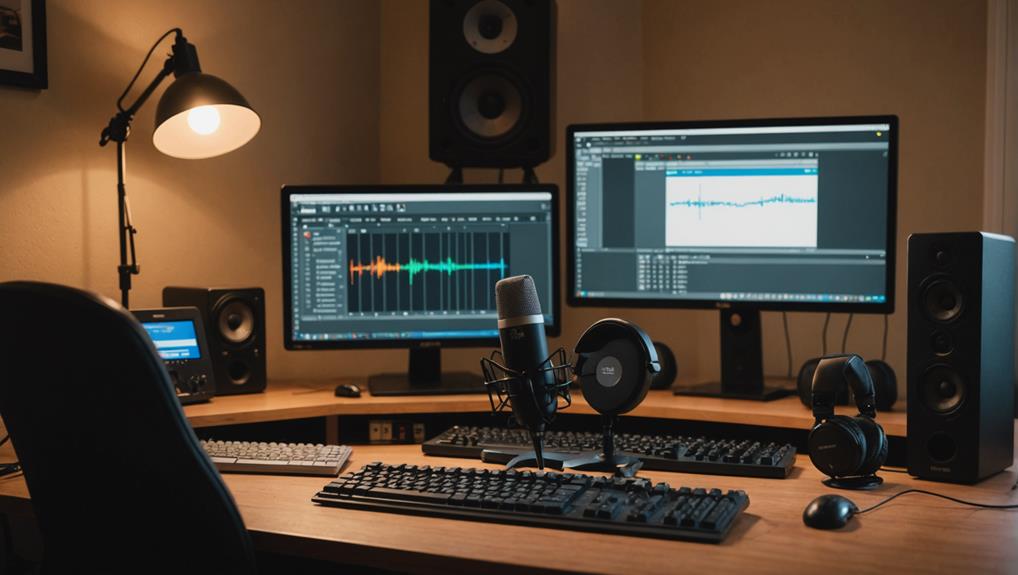
Invest in Quality Equipment
Investing in quality equipment is vital for achieving professional-sounding voiceover recordings that stand out. A good microphone, like a condenser mic, captures detailed vocals, greatly improving sound quality over built-in laptop options. Pair it with an audio interface, such as the Focusrite Scarlett series, to convert analog signals into digital audio, enabling high-quality recordings.
Additionally, closed-back headphones are important for accurate sound monitoring while recording. They prevent audio bleed, allowing you to make precise adjustments during post-production. Don’t forget a pop filter; it’s a simple accessory that minimizes plosive sounds, guaranteeing cleaner audio and reducing editing time.
Here’s a quick summary of important gear:
| Equipment | Purpose | Recommendation |
|---|---|---|
| Microphone | Captures detailed vocals | Condenser mic |
| Audio Interface | Converts analog to digital audio | Focusrite Scarlett series |
| Closed-Back Headphones | Guarantees accurate sound monitoring | Any reputable brand |
Utilize Acoustic Treatment
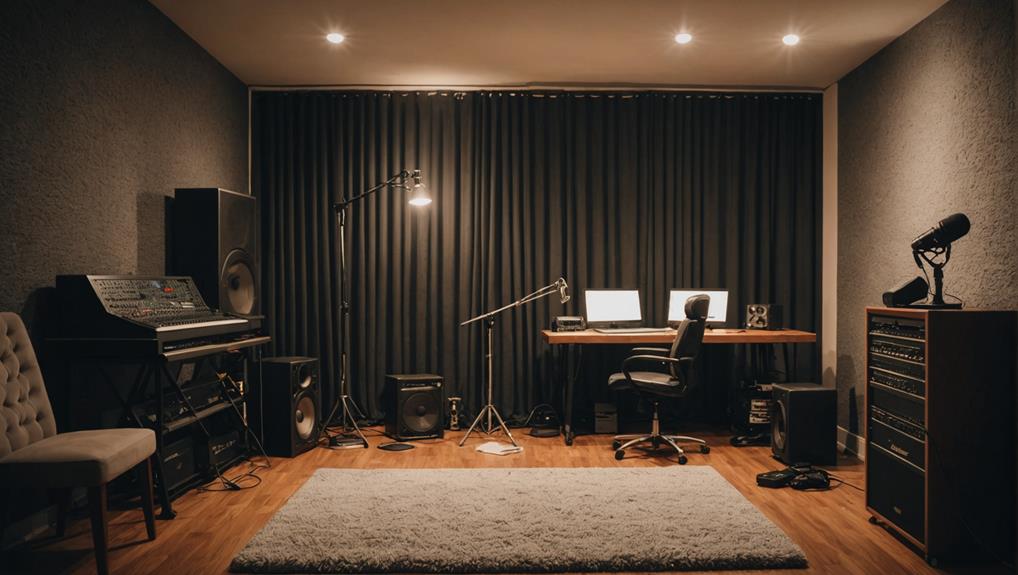
Utilizing acoustic treatment in your recording space dramatically reduces sound reflections and echoes, resulting in clearer and more professional audio quality. To achieve this, consider incorporating various sound-absorbing materials like foam panels and bass traps. These products effectively minimize unwanted reverberation, enhancing your overall sound quality.
If you’re on a budget, don’t worry; you can still improve your recording environment. Hanging heavy curtains over windows or using carpets on the floor can serve as cost-effective solutions for sound absorption. Test different placements and combinations of these treatments to pinpoint the best configuration for your specific space.
Regularly assess your acoustic treatment as your recording needs evolve. What worked once may not suit future projects, so stay flexible and make adjustments as necessary.
Master Microphone Techniques
Mastering microphone techniques is crucial for capturing high-quality voice recordings that truly resonate with your audience.
Start by maintaining a consistent distance of 6-8 inches from the microphone. This helps achieve clear audio capture while minimizing the proximity effect, which can create unnatural bass boosts.
Using a pop filter is essential, as it reduces plosive sounds from hard consonants, enhancing overall audio clarity and preventing distortion during recordings.
Experiment with different microphone placements and angles to find the sweet spot that best captures your voice’s tonal quality. Each position can greatly impact your recordings.
Before diving into your session, don’t skip vocal warm-ups. They prepare your voice, improve performance, and reduce strain during longer recordings.
While you’re recording, keep an eye on your recording levels; aim for peaks around -12 dB to -6 dB. This range helps prevent clipping and distortion, maintaining a dynamic range that makes your voice shine.
In your home studio, these microphone techniques will elevate your audio quality and guarantee your voice stands out in every project.
Embrace these tips to make the most of your voiceover recordings!
You can learn more from our bedroom recording e-book HERE.
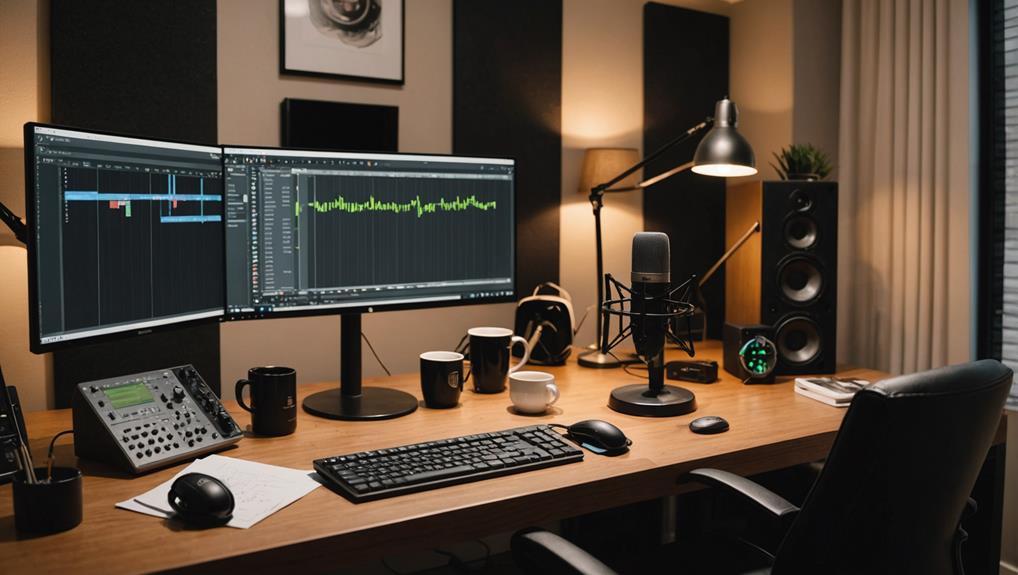
Monitor Your Audio Levels
Monitoring your audio levels is essential to guarantee your recordings maintain clarity and avoid unwanted distortion. Aim for levels between -12dB and -6dB for ideal clarity, making sure your voiceover recording shines through without clipping. Utilize audio meters in your recording software to visualize your input levels, keeping them consistent throughout your sessions.
Investing in a reliable audio interface is vital, as it allows for precise level adjustments that enhance sound quality. Regularly check the gain settings on your microphone and audio interface, since improper gain can lead to inconsistent sound quality and listener fatigue.
When recording, don’t forget to use closed-back headphones. They help you monitor your audio in real-time, allowing you to catch any issues before they become part of the final product. This proactive approach guarantees that you maintain control over your audio levels, preventing any unpleasant surprises during editing.
Record Multiple Takes
Recording multiple takes of each line not only gives you options to choose from but also helps capture different nuances in your performance.
As a voice actor, it’s vital to record multiple takes to explore variations in tone, pacing, and emotion. Aim for at least three takes per line or section; this way, you can select the best performance during the editing process.
Keeping track of the characteristics of each take—like tone and energy level—can greatly streamline your audio editing later. This organization allows you to pinpoint which take best fits the project’s needs.
Plus, regularly practicing multiple takes not only enhances your vocal performance but also builds confidence, leading to a more polished delivery in your future recordings.
In your voice over studio, consider utilizing techniques like overdubbing during the mixing process. This approach helps in layering sound by combining the best aspects of your different takes, creating a richer audio experience.
Edit for a Polished Sound
Editing your voiceover is vital for achieving a polished sound that captivates your audience. Start by trimming the beginning and end of your recordings to eliminate dead space, making your audio more engaging. Use audio editing software to adjust levels, applying compression to maintain consistent volume and enhance clarity.
| Step | Action | Purpose |
|---|---|---|
| Trim | Remove dead space | Engage listeners immediately |
| Adjust Levels | Apply compression | Maintain consistent volume |
| Equalization (EQ) | Boost vocal presence | Enhance clarity and polish |
Implement equalization to remove unnecessary frequencies and boost vocal presence, which is vital for a polished sound. Be mindful when incorporating effects like reverb or delay; they can add depth but shouldn’t overwhelm your voice.
After editing, regularly export your audio and listen on different devices. This helps you assess overall quality and guarantees consistency across platforms. By following these steps, you’ll create a professional-sounding voiceover that truly resonates with your audience.

3 responses to “7 Simple Voiceover Recording Tips for Home Studios”
[…] reducing echo, and improving audio quality in your recording space. Additionally, incorporating sound-absorbing materials like foam panels can further enhance the acoustics of your […]
[…] consider conducting sound checks to identify any issues before recording, as pre-recording preparation can help set the stage for […]
[…] Invest in a decent condenser microphone for vocals and acoustic instruments, and consider a dynamic microphone for live performances. These serve different recording needs, optimizing your sound capture. Additionally, using a quality audio interface can considerably enhance your audio fidelity, ensuring that your recordings are crisp and clear, especially when aiming for proper microphone placement. […]