To access your sound, focus on key recording techniques that elevate your audio quality. Start by choosing the right microphone; a condenser microphone works well for vocals, while dynamics suit live settings. Position your microphone correctly—3-5 inches for vocals and 35-45 cm for instruments. Create a supportive recording environment by minimizing noise and using acoustic treatments like foam panels. Maintain consistent distances and monitor levels for clarity. Familiarize yourself with your recording software and collaborate with others for growth. Exploring these practices will enhance your skills, leading to a deeper understanding of the art of sound capture.
Key Takeaways
- Choose the right microphone type for your recording needs, such as a condenser for vocals or dynamic for live performances.
- Create an inspiring recording environment with acoustic treatment like foam panels and soft furnishings to enhance sound quality.
- Position microphones correctly, maintaining a distance of 3-5 inches for vocals and 35-45 cm for acoustic instruments.
- Regularly check audio levels and experiment with microphone angles for optimal sound clarity and balance.
- Utilize affordable DAWs and high-quality audio interfaces to streamline your recording process and improve audio quality.
Microphone Selection and Placement
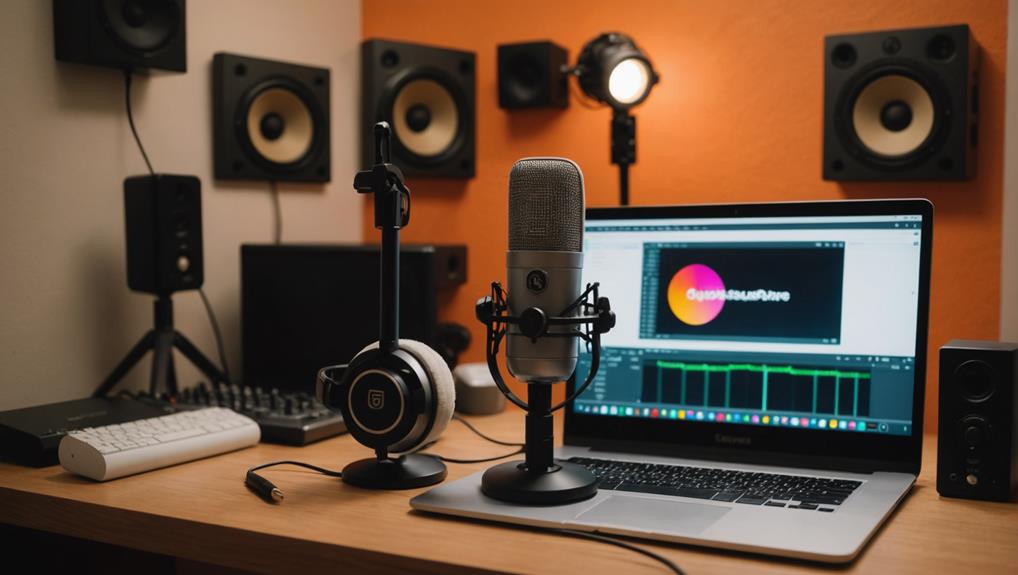
When you're diving into recording, selecting the right microphone and positioning it effectively are essential steps that can greatly impact your sound quality.
Invest in a decent condenser microphone for vocals and acoustic instruments, and consider a dynamic microphone for live performances. These serve different recording needs, optimizing your sound capture. Additionally, using a quality audio interface can considerably enhance your audio fidelity, ensuring that your recordings are crisp and clear, especially when aiming for proper microphone placement.
For clarity and to minimize background noise, position the microphone 3-5 inches from the speaker's mouth. This distance enhances vocal articulation while reducing interference.
When recording an acoustic guitar, adjust your microphone placement accordingly. A distance of 35-45 cm from the soundhole typically achieves a balance between clarity and ambient sound.
Experiment with dual mic techniques for a richer tone. Place one microphone near the soundhole to capture direct sound, while positioning another further away to pick up ambient acoustics. This technique can considerably enhance your recording's depth.
Avoid common pitfalls by securing the microphone on a stand, preventing handling noise and maintaining consistent placement during sessions.
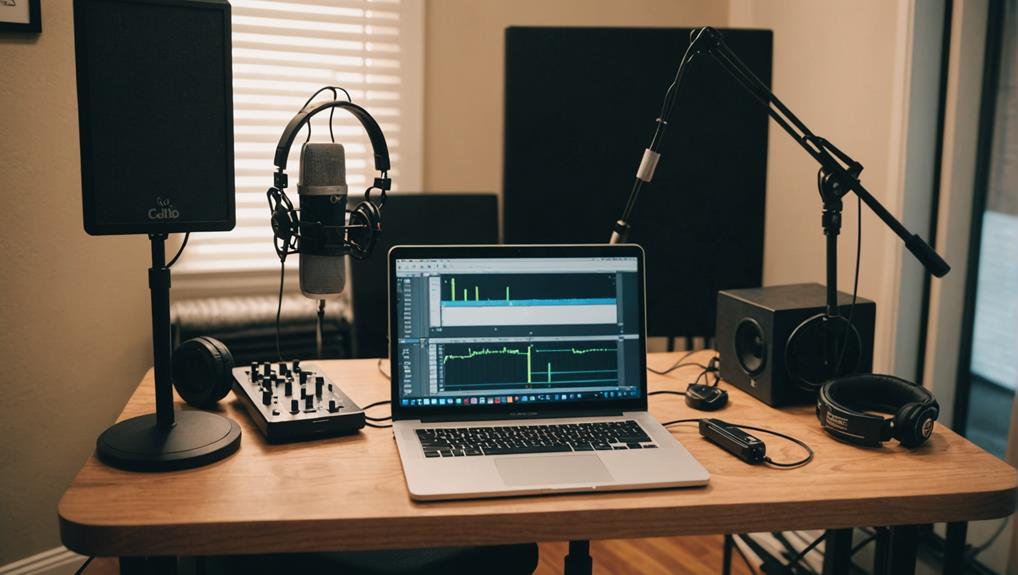
Environment for Recording Success
Creating an inspiring studio atmosphere is essential for enhancing your creativity and performance quality.
Implementing acoustic treatment, such as DIY acoustic panels, and managing noise effectively will greatly improve sound clarity and reduce distractions.
Inspiring Studio Atmosphere
An inspiring studio atmosphere cultivates creativity and enhances focus, fundamental components for successful recording sessions. A clean and organized space will markedly influence your results, while clutter can stifle innovation and concentration.
Prioritize comfort for artists; a welcoming environment plays an essential role in performance quality. Make sure that they've time to warm up and adjust before recording, as this leads to more authentic and emotional performances that resonate in the final product.
Additionally, investing in quality acoustic treatment, such as acoustic panels and bass traps, can further enhance the recording environment by minimizing echo and unwanted noise.
Encouraging constructive communication is critical. Use positive language to foster a supportive atmosphere, allowing artists to feel safe in expressing their ideas without fear of negative criticism.
This open dialogue can lead to innovative collaborations and improved outcomes.
While sound quality is often linked to technical aspects, remember that the environment itself matters too. Implementing acoustic treatment can minimize unwanted noise, enhancing clarity and focus during recording sessions.
Soft furnishings and soundproof panels can absorb excess sound, creating an ideal setting for artistic expression.
Acoustic Treatment Essentials
How can acoustic treatment transform your recording environment? By strategically using sound-absorbing materials, you can drastically enhance your room acoustics, leading to clearer recordings. A well-treated space minimizes unwanted reflections and echoes, allowing for a more controlled sound capture.
Here are four essentials to contemplate for effective acoustic treatment:
- Foam Panels: Install these on walls to absorb high-frequency sounds and reduce echo.
- Bass Traps: Place these in corners to manage low-frequency buildup, enhancing overall clarity.
- Soft Furnishings: Incorporate carpets, curtains, and upholstered furniture to further absorb sound waves and minimize background noise.
- Diffusers: Use these to scatter sound waves, preventing harsh reflections while maintaining a lively sound.
Creating a controlled recording environment not only improves sound quality but also prevents sound leakage, allowing you to capture instruments and vocals without interference from external sources.
The result? A more efficient and effective recording process, reducing the need for extensive post-production work. Prioritize your acoustic treatment for a professional sound that resonates.
Noise Management Techniques
Even with proper acoustic treatment, managing noise remains vital for achieving high-quality recordings. To enhance audio quality, you should prioritize recording in quiet spaces. Smaller rooms with soft furnishings can absorb sound, considerably reducing echo and minimizing background noise.
Identifying and eliminating potential noise sources is essential in crafting a controlled environment for your recording sessions. Check for distractions like electronics, open windows, or creaky doors that could interfere with your audio.
Implementing acoustic treatment materials, such as sound panels, can further prevent unwanted noise capture, fostering clearer recordings. Always turn off devices like air conditioning and phones to minimize background noise, ensuring your primary sound source is captured cleanly.
Familiarizing yourself with common background noise sources will enable you to proactively address issues, enhancing the quality of your recordings. Remember, every detail counts; even slight disturbances can detract from listener engagement.
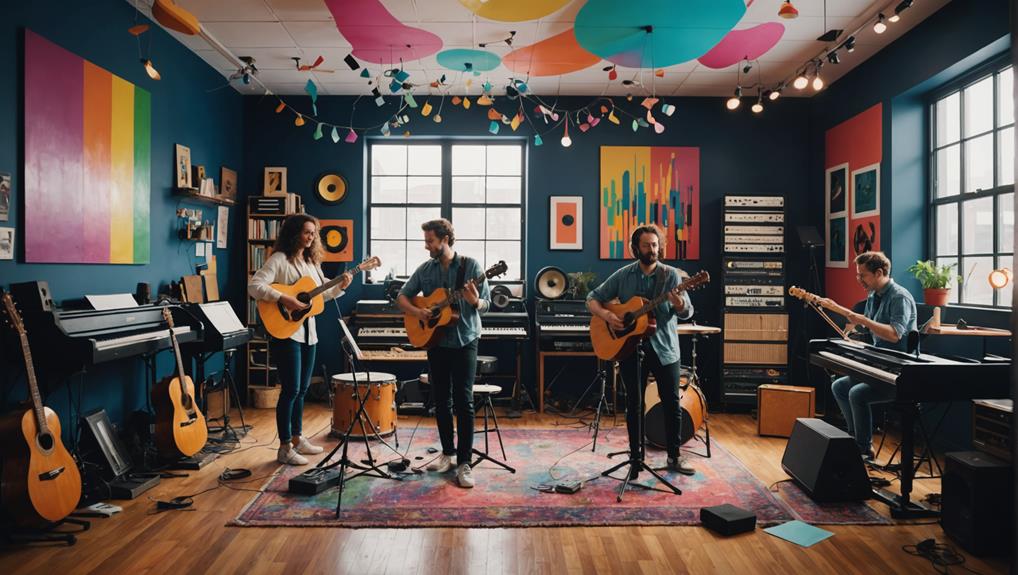
Positioning Instruments and Vocals

Positioning instruments and vocals correctly is essential for achieving ideal sound quality in your recordings. The way you arrange sound sources and place the microphone can greatly impact the overall audio quality. Here are some key strategies to guarantee optimal positioning:
- Distance: Position musicians about three meters from the microphone. This distance fosters ensemble interaction while capturing a balanced sound.
- Specific Instruments: For acoustic instruments like guitars, maintain a mic distance of 35-45 cm from the soundhole. This distance balances clarity and ambient sound.
- Guidance: Use a marker or dummy mic to help musicians with instrument placement. This method guarantees consistent levels and improved sonic quality across recordings.
- Dynamic Balance: When recording groups with one mic, be mindful of dynamic balance. Brass instruments can easily overpower softer sounds, so adjust accordingly.
Dynamic Balance and Clarity
To achieve dynamic balance in your recordings, position instruments evenly around a single microphone, ensuring a cohesive sound.
You'll enhance audio clarity by adjusting microphone placement and volume levels to prevent louder instruments from overshadowing softer ones.
Experimenting with distances and angles will help you find ideal placements that capture each instrument's natural sound while minimizing unwanted noise.
Achieving Dynamic Balance
Achieving dynamic balance in your recordings is essential for crafting a cohesive mix, especially when certain instruments, like brass, can easily overshadow others.
To effectively manage this balance, consider the following strategies:
- Microphone Placement: Position your microphone strategically to capture an even sound from all performers, guaranteeing clarity and separation between instruments.
- Consistent Distance: Maintain a consistent distance of about three meters between musicians and the microphone. This helps preserve dynamic balance while allowing for natural interaction during the performance.
- Monitor Audio Levels: Regularly check your audio levels throughout the recording session. This guarantees that no single element dominates the mix, promoting a balanced sound.
- Experiment with Angles: Don't hesitate to experiment with microphone angles. Adjusting these can enhance both the clarity and spatial perception of the recording.
Enhancing Audio Clarity
Dynamic balance sets the foundation for clarity in your recordings. To achieve this, prioritize the positioning of musicians around a single microphone. This guarantees clarity for all instruments, especially those with prominent frequencies like brass. Experiment with microphone distances and angles; about three meters is preferable for ideal ensemble interaction.
Utilize the table below to quickly reference essential techniques for enhancing audio clarity:
| Technique | Purpose | Key Considerations |
|---|---|---|
| Positioning | Guarantee balanced sound capture | Avoid excessive proximity |
| Close-Miking | Minimize noise bleed | Use selectively, not universally |
| Mic Distance | Improve clarity and presence | Aim for about three meters |
| Placement Adjustments | Focus on unique sounds | Adjust for instruments like saxophones |
Make certain to replicate the acoustic environment for the listener, creating a sense of presence that enhances clarity and engagement. Adjust mic placement for instruments to avoid capturing excessive key noise, guaranteeing a cleaner, more focused sound. These steps are crucial in your quest for pristine audio clarity.
Preparation for Recording Sessions
Effective preparation is essential for successful recording sessions, as it sets the stage for a smooth process and high-quality outcomes. To help you achieve the best results, consider these tips and tricks for your preparation:
- Organize Audio Files: Create a dedicated folder for sound files. This guarantees everything is easily accessible during your session, minimizing distractions.
- Checklist Development: Develop a checklist of performance essentials, including equipment, scripts, and notes. This builds confidence and guarantees you're fully prepared before recording.
- Warm-Up Time: Allow artists sufficient warm-up time to adjust to the recording environment. This can greatly enhance performance quality and comfort.
- Familiarization: Guarantee all musicians thoroughly know their parts. This minimizes rehearsal time and maximizes efficiency during the recording process.
Additionally, set your recording device to the highest sample rate, ideally 96KHz, and use 24-bit recording for improved audio quality and flexibility in sound design.
Using Technology Effectively
As you plunge into the world of recording, leveraging technology can greatly enhance your workflow and sound quality. Start by choosing an affordable digital audio workstation (DAW) like GarageBand or Audacity. These platforms make recording much easier with their user-friendly interfaces and essential features.
To guarantee your recordings sound better, invest in a high-quality audio interface, such as the Focusrite Scarlett series, which offers low-latency performance.
Don't overlook the value of plugins; experiment with free or low-cost options like iZotope's RX Elements or TDR Nova. These can add depth and texture to your tracks without straining your budget.
Additionally, using MIDI controllers allows you to create and manipulate virtual instruments seamlessly within your DAW, making layering sounds and building arrangements more intuitive.
Collaboration and Learning Opportunities
Collaborating with other musicians can greatly elevate your recording skills and expand your creative horizons. Engaging with a community not only cultivates collaboration but also opens up numerous learning opportunities. Here are some key strategies to enhance your experience:
- Network Locally: Attend workshops and connect with local musicians to exchange creative techniques and inspire each other.
- Join Community Forums: Participate in online music forums where you can seek advice and share insights, fostering a supportive environment for growth.
- Document Your Process: Keep track of your collaborative sessions and insights. This can serve as a valuable reference for future projects, promoting continuous improvement.
- Explore Online Channels: Engage with music-making tutorials and channels to expose yourself to advanced techniques and diverse perspectives from experienced artists.
Through these methods, collaboration can lead to unique sound explorations and improvisation, which are essential for developing your distinctive artistic voice.
Embrace these opportunities, and you'll find that the creative exchange will sharpen your skills and elevate your recordings.
Conclusion
By implementing these recording tips, you can greatly enhance your sound quality. Did you know that using the right microphone can improve your audio clarity by up to 30%? This simple adjustment, along with proper placement and a controlled environment, can elevate your recordings from amateur to professional. Remember, preparation and collaboration are key to success. Embrace technology, learn continuously, and you'll reveal your sound potential, paving the way for future creative endeavors.
